Getting Started with Solar
This version walks you through solar in a practical order: define your goal, measure your real load, size your battery, size your solar input, then choose parts that match.
Quick Formula
Daily load (kWh) + autonomy target (days) + seasonal margin = battery size. Then size solar so average daily production replaces what you use.
Solar Roadmap in 5 Steps
Most expensive solar mistakes come from skipping measurement and guessing system size. Follow this order and your first system design will be much closer to reality.
1
Choose Goal
Backup, bill reduction, or off-grid full-time.
2
Measure Loads
Use meter data, not nameplate guesses.
3
Size Battery
Pick autonomy target and reserve margin.
4
Size Solar
Replace daily use in your worst months.
5
Pick Hardware
Controller, inverter, protection, wiring.
Want Help Sizing Your First System?
Bring your load list and we will help you choose battery size, panel wattage, and the right components for your budget and goals.
Step 1: Define Your Target
Your use case decides everything. The same refrigerator load looks very different in a 12-hour outage plan versus an off-grid cabin with 2 cloudy days of reserve.
Outage Backup
Pick mission-critical loads and a runtime target in hours.
Hybrid / Bill Reduction
Use utility history to offset the biggest daily consumption blocks.
Off-Grid Living
Design for worst-month production, not best-month sunshine.
Step 2: Measure Real Energy Use
These three tools give you enough data to design confidently. Start with your baseline, then break out major loads that create peaks.
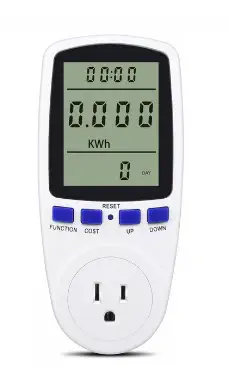
Plug-In Watt Meter
Measure one appliance for 24 hours to capture real kWh/day, not theoretical draw.
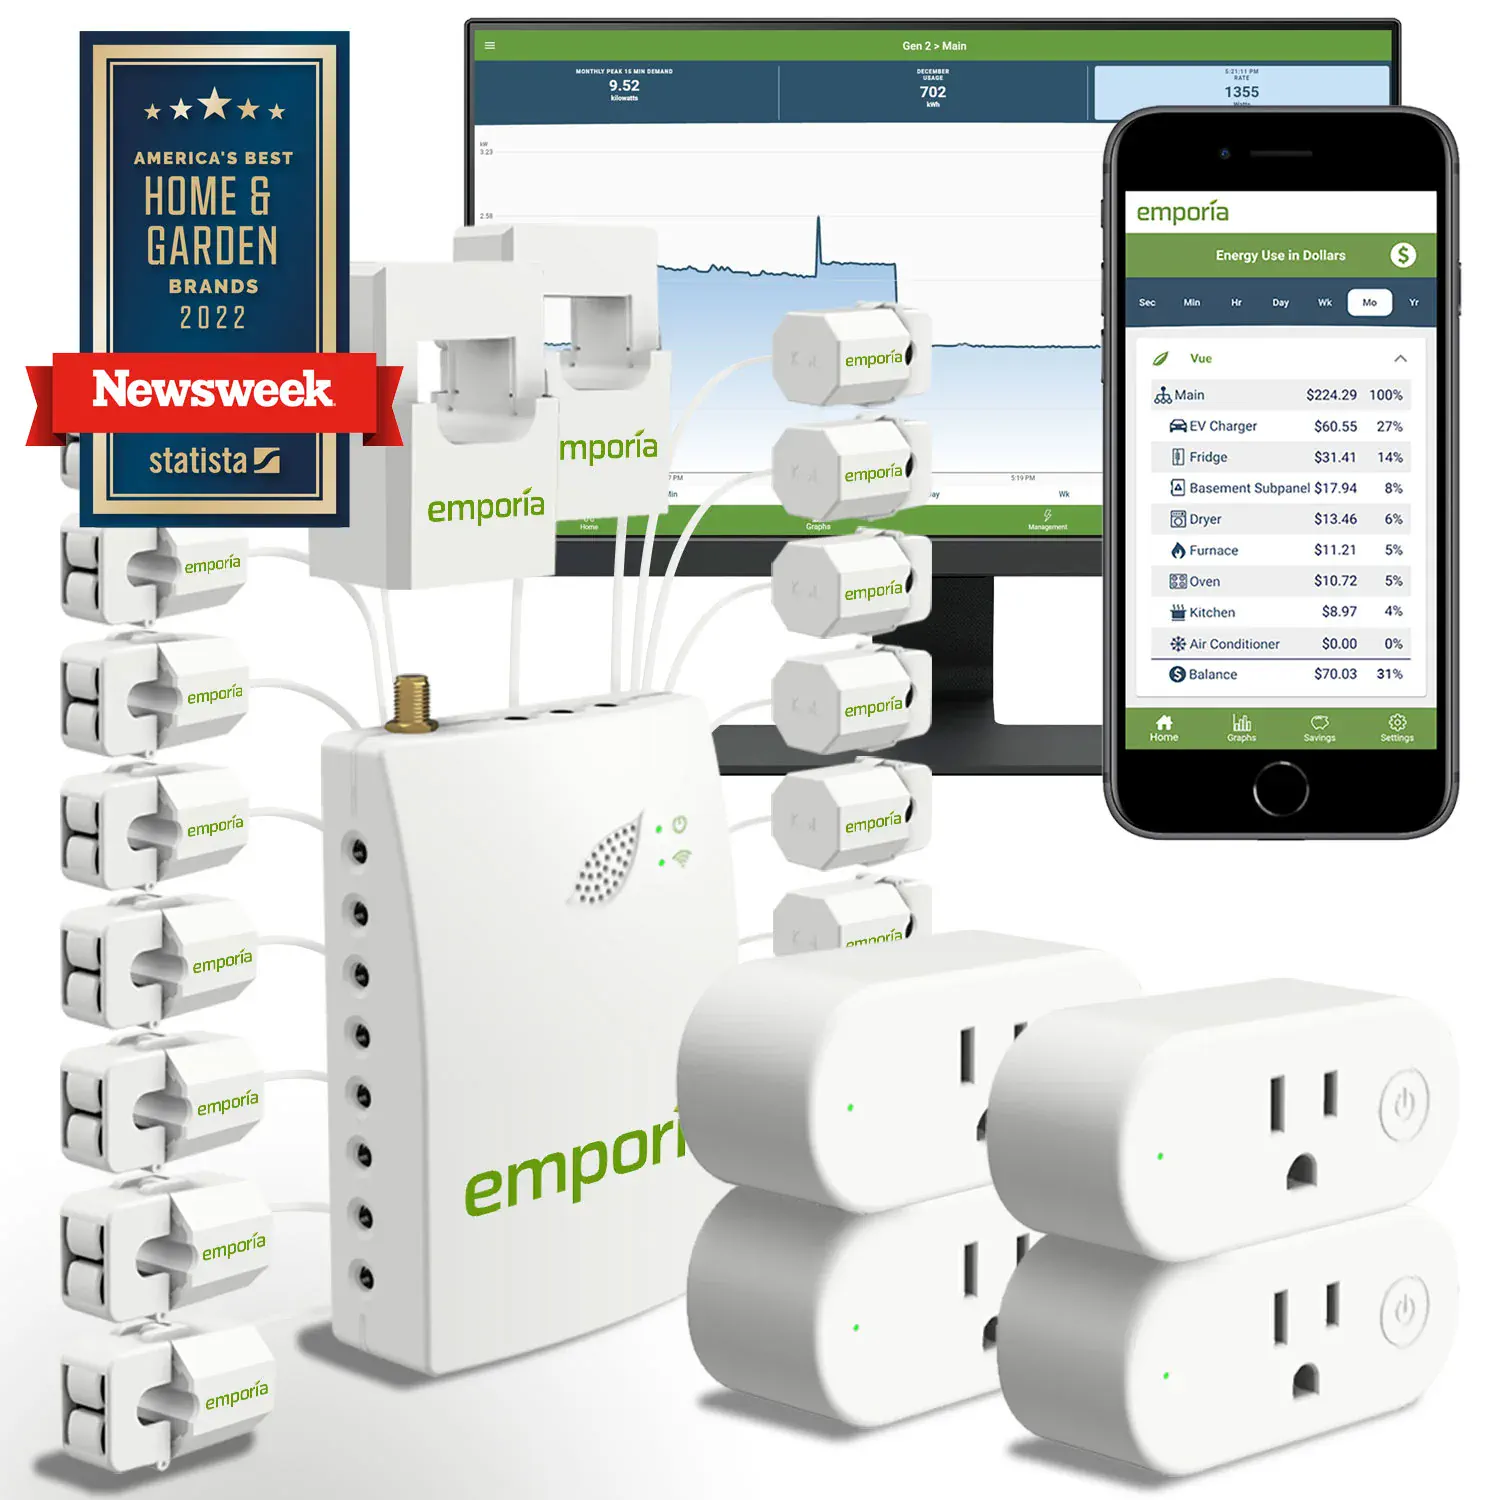
Whole-House Meter
A panel meter gives hourly and circuit-level insight so you can identify hidden energy spikes.
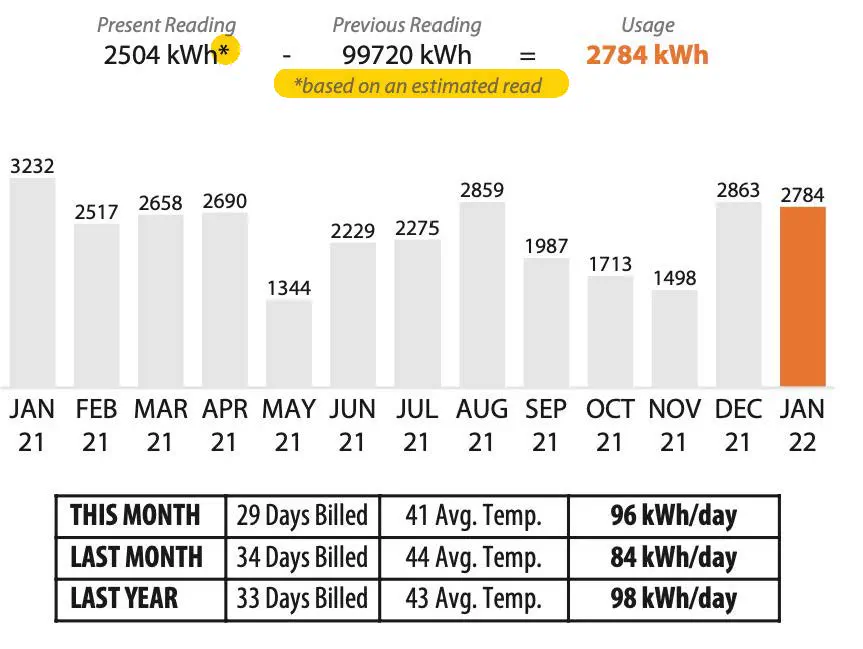
Utility Bill Baseline
Convert annual kWh to daily average to sanity-check your measured load profile.
Step 3: Size the Battery Bank
Start with daily load, then multiply by autonomy days and include a reserve for cloudy weather and aging.
Battery kWh target = daily kWh x autonomy days x safety factor
Example: 6 kWh/day x 2 days x 1.2 margin = 14.4 kWh recommended battery capacity.
Step 4: Size the Solar Input
Panels need to replace daily use during your lower-sun periods, not just in summer.
Solar watts needed = (daily kWh x 1000) / peak-sun-hours
Example: 6 kWh/day with 3.5 peak sun hours is about 1715W before system losses. Add 15-25% headroom for realistic conditions.
Step 5: Build a Safe Parts List
A strong solar design is more than battery and panel math. Reliability comes from matching hardware ratings, wire sizing, and proper circuit protection.
Panels
Match string voltage/current to controller limits.
Charge Controller
MPPT for higher efficiency and flexible array design.
Inverter
Size for surge loads, not just running watts.
Protection
Use proper fusing, disconnects, and safe cable sizing.
Design Review Tip
Bring your appliance list, daily kWh estimate, and roof or mounting constraints. We can usually tighten your first design in one conversation and prevent overbuying.
Solar Classes at Mac's
If you prefer hands-on learning, our classes cover beginner through advanced design topics, including real examples from local off-grid and backup projects.
- ✓ Beginner: core concepts, load math, and component roles
- ✓ Intermediate: wiring strategy, controller setup, and inverter sizing
- ✓ Advanced: battery integration, expansion planning, and troubleshooting
80%
Solar Price Drop Since 2004
Hardware is more affordable, tools are better, and sizing data is easier to collect than ever. It is a great time to build a reliable starter system.